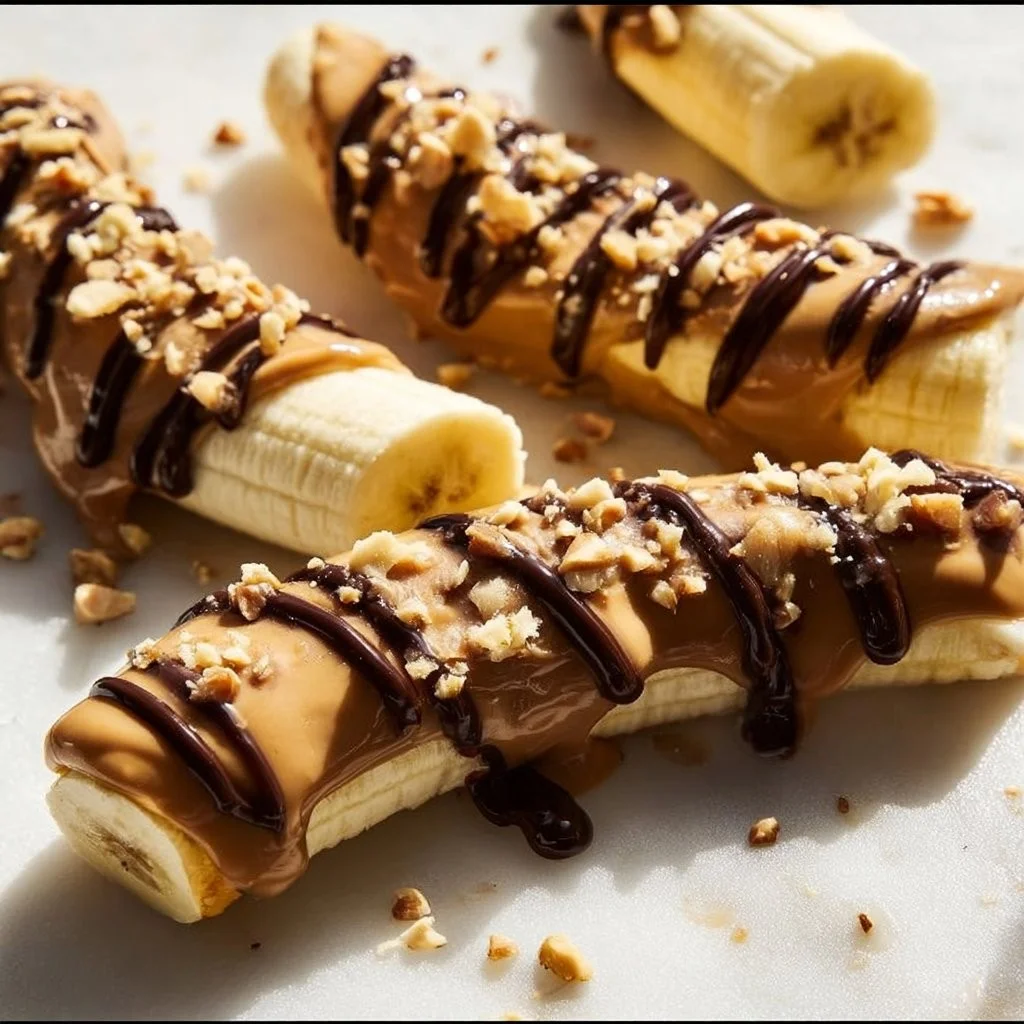
Low Calorie Frozen Banana Snickers
If you eat gluten-free for health or comfort, I know the small wins matter — little treats that don’t upset your stomach, don’t require label-detective work, and actually taste like something worth smiling about. A common worry is hidden gluten in snacks, or crumbs and shared utensils that can cause cross-contact. I want to reassure you: this Low Calorie Frozen Banana Snickers recipe is naturally gluten-free when you use certified gluten-free ingredients, is nourishing and simple to make, and gives you a safe, family-friendly frozen bite that’s great for dessert or an afternoon pick-me-up.
A Quick Look at This Low Calorie Frozen Banana Snickers Recipe
This recipe pairs ripe banana with a smear of natural peanut butter, chopped peanuts and a dark chocolate coating — a mix that gives you fiber from the banana, a touch of protein and healthy fats from peanut butter and peanuts, plus antioxidants from dark chocolate. It’s naturally gluten-free, but I recommend using certified gluten-free chocolate chips and any add-ins to avoid cross-contact. The result is a low-calorie, portion-controlled frozen treat you can prep ahead for busy days or to serve to kids and guests who need gluten-free options. It’s easy to make, forgiving, and fits into a safe gluten-free lifestyle as a dessert, snack, or party platter addition.
Ingredients You’ll Need for Low Calorie Frozen Banana Snickers
Below I break the ingredients into essentials, optional add-ons, and safe substitutions. All ingredients listed here must be 100% gluten-free — I’ll note when an item should be certified gluten-free on the label.
Essentials
- 2 large firm, ripe bananas (about 240 g total) — choose bananas that are ripe but not overly soft so the slices hold shape when frozen.
- 2–3 tablespoons natural creamy peanut butter (unsweetened) — choose a brand labeled “gluten-free.” Avoid spreads with added malt or wheat-derived ingredients.
- 2 tablespoons roasted unsalted peanuts, roughly chopped — use plain peanuts and check packaging for “packed in a facility that also processes wheat” warnings; choose a certified gluten-free brand if possible.
- 1/4 cup (40 g) dark chocolate chips (70% cacao or higher) — chocolate is often naturally gluten-free, but many brands add ingredients or process in shared facilities, so select chocolate chips labeled “certified gluten-free.”
- 1 teaspoon coconut oil — helps the chocolate melt smoothly and set with a glossy finish.
- Sea salt flakes (optional) — a light sprinkle enhances flavor contrast.
Note: All the ingredients above are naturally gluten-free, but processing facilities and cross-contact can introduce gluten. I always recommend checking labels and buying certified gluten-free versions of chocolate chips, peanut butter, and any nut-containing products whenever possible.
Optional Add-ons
- Mini pretzel pieces — only use gluten-free pretzels that are labeled certified gluten-free. Ordinary pretzels contain wheat.
- Shredded coconut — choose unsweetened and certified gluten-free coconut flakes if label safety is a priority.
- Chopped dates — naturally gluten-free and add chewiness and extra sweetness.
- A dusting of cocoa powder or chopped unsalted peanuts for extra texture.
These add-ons enhance flavor and texture but must be certified gluten-free if processed in facilities that handle wheat or barley.
Substitutions and Gluten-Free Adjustments
- Peanut butter: swap for almond butter or sunflower seed butter if you prefer — pick brands labeled gluten-free. Sunflower seed butter is a good allergy-friendly swap but always check for cross-contact warnings.
- Peanuts: if someone in your household is allergic to peanuts, replace chopped peanuts with chopped roasted, unsalted almonds or pumpkin seeds (pepitas). Make sure they’re from a gluten-free-certified source.
- Dark chocolate: if you need dairy-free chocolate, choose certified gluten-free vegan chocolate chips. If cacao content is lower, taste and texture will change slightly.
- Coconut oil: you can omit it and use a small amount of vegetable oil (neutral-flavored) to aid melting, but coconut oil firms better at freezer temperatures — verify gluten-free labeling.
- Pretzels: use certified gluten-free pretzel twists or crushed gluten-free graham crackers for a crunchy element.
Always check ingredient labels and prefer certified gluten-free products for anything that could be cross-contaminated in processing.
Ingredient alternatives for allergies or availability
If you or someone you cook for has additional dietary needs, here are allergy-friendly alternatives and notes on avoiding hidden gluten sources.
- Nut-free option: Use sunflower seed butter (e.g., “Wowbutter” brands) or soy nut butter labeled gluten-free. These provide similar texture to peanut butter. Beware of added stabilizers — check ingredients for malt or barley extracts.
- Seed-free option: Use smooth tahini (sesame paste) if tolerated. Tahini is typically gluten-free but can vary by brand.
- Chocolate allergy or sensitivity: Use carob chips or a thin fruit-based drizzle (pureed dates thinned slightly with water) as a chocolate-free option. Check labels; some carob chips may be processed with chocolate equipment.
- Gluten-free crunch: Instead of mini pretzels, choose certified gluten-free cereal crisps, crushed gluten-free cookies, or toasted, chopped nuts.
- Hidden gluten sources to avoid: malt flavoring (from barley), certain natural flavors that aren’t specified, and protein isolates that can be derived from wheat — when in doubt, contact the manufacturer or choose “certified gluten-free.”
Highlighting ingredients that should be certified gluten-free:
- Chocolate chips — high priority for certification due to shared equipment.
- Any processed mix-ins (pretzels, coconut flakes, flavored nuts) — choose certified gluten-free.
- Peanut butter and nut butters if the brand doesn’t explicitly state “gluten-free.”
A quick label-reading tip: “gluten-free” on the label is the simplest reassurance, but also scan for “may contain wheat” or “processed in a facility that also processes wheat/barley/rye” warnings. If you’re highly sensitive, avoid products with those warnings.
How to Make Low Calorie Frozen Banana Snickers Step-by-Step
Below is a clear, beginner-friendly method. I include safety tips to minimize cross-contamination and keep things simple.
Prepare your workspace and tools.
- Wash countertops, cutting board, knives, and any utensils you’ll use. If you share kitchen space with non-gluten-free cooking, use a clean cutting board and utensils reserved for gluten-free use, or wash well with hot, soapy water and dry before use.
- Line a baking sheet with parchment paper or use a silicone mat. Avoid trays with crumbs from previous gluten-containing foods.
Slice the bananas.
- Peel 2 large firm, ripe bananas and slice them into thick coins about 1/2 inch (1.2 cm) thick. You should get roughly 16–20 coins depending on banana size. Thicker slices are easier to top and less likely to break.
Arrange and pre-freeze the banana slices.
- Place the banana coins in a single layer on the parchment-lined baking sheet, making sure slices do not touch.
- Freeze the tray for 15–20 minutes. The goal is to firm the bananas so they hold the toppings, but not freeze rock-hard — this makes spreading peanut butter easier and avoids cracking the chocolate later.
Measure and prepare toppings.
- While the banana slices are chilling, measure 2–3 tablespoons of natural creamy peanut butter and roughly chop 2 tablespoons of roasted unsalted peanuts. If using optional add-ins (mini gluten-free pretzel pieces, shredded coconut, chopped dates), measure those now and keep them nearby.
- If you’re using extra utensils for the peanut butter (e.g., a small offset spatula), make sure they’re clean and gluten-free.
Add peanut butter and nuts to each banana coin.
- Remove the tray from the freezer. Working quickly keeps the bananas from warming too much. Spread about 1/2 teaspoon of peanut butter on each banana coin. If your peanut butter is thick, briefly stir it so it’s spreadable.
- Sprinkle each peanut-buttered coin with a pinch of chopped peanuts and a flaky pinch of sea salt if you like salty-sweet contrast. Add optional toppings now if you’ll use them. Return the tray to the freezer for a couple of minutes if the peanut butter softens too much while you prepare the chocolate.
Melt the chocolate safely.
- In a microwave-safe bowl, combine 1/4 cup (40 g) dark chocolate chips with 1 teaspoon coconut oil. Microwave in 15-second bursts, stirring thoroughly each time, until the chocolate is fully melted and smooth (about 45 seconds total depending on your microwave). Alternatively, melt over a double boiler on low heat.
- Keep one small spoon for drizzling and a separate clean utensil if you’ve been in contact with other food to avoid cross-contact.
Coat the banana bites in chocolate.
- Using a spoon, drizzle the melted chocolate over each banana bite for a light coating. If you want a thicker top, dip just the peanut-buttered top into the melted chocolate and let excess drip back into the bowl. Work quickly so the chocolate sets evenly in the freezer.
- If you’d like, sprinkle an extra pinch of chopped peanuts, pretzel pieces (certified gluten-free), or shredded coconut on the chocolate before it sets.
Freeze until set.
- Return the tray to the freezer and freeze for 30–60 minutes, until the chocolate is fully set and the bananas are frozen solid. Cover the tray loosely with a breathable lid or another piece of parchment if you’re stacking multiple trays — avoid plastic wrap that could stick to chocolate.
Serving and thawing.
- For best texture, let the bites sit at room temperature for about 5 minutes before serving. This softens the banana slightly for a pleasant bite-size texture.
- Store leftovers in a single layer or separated by parchment in a freezer-safe container for up to 2 weeks. If you stack them, place parchment between layers to avoid sticking.
Gluten-free safety tips during preparation:
- Use clean hands and utensils. If you handle gluten-containing foods before these, wash hands and change towels or wear gloves.
- Use a separate cutting board for bananas and toppings if your main board is used for gluten-containing bread or crackers.
- Keep packaged ingredients in their original containers until use to avoid mix-ups. If someone in your household is celiac, label the finished container “gluten-free” or store it separately in the freezer to avoid accidental cross-contact.
Common Mistakes to Avoid
Keeping your kitchen and ingredients truly gluten-free is as much about technique as it is about careful shopping. A few small missteps can lead to cross-contamination or a less-than-ideal texture. Below I cover three common mistakes and how I handle them.
I find people often underestimate how easily gluten can transfer via utensils, crumbs, or shared spreads. Preventing that is simple: clean surfaces, separate tools, and certified ingredients. Also pay attention to texture when freezing and melting — bananas and chocolate are forgiving, but timing matters.
Mistake 1: Using non-certified or unlabeled ingredients and missing hidden gluten
Not all foods that look naturally gluten-free are safe due to processing or flavor additives. For this recipe, using chocolate chips, flavored peanut butter, or pre-packed coconut that isn’t labeled gluten-free can introduce gluten. Always choose brands labeled “certified gluten-free” when possible — especially for chocolate chips and any crunchy add-ins. If a product says “may contain wheat,” skip it. I often keep a shortlist of trusted brands to avoid second-guessing at the store.
Mistake 2: Ignoring cross-contact on tools and surfaces
Even if every ingredient is gluten-free, crumbs on a cutting board, a used spoon, or a knife used for both regular and gluten-free foods can contaminate your batch. To avoid this, wash everything thoroughly before you start, reserve tools for gluten-free prep when possible, and set aside a clean surface for assembly. I also recommend using parchment or a silicone mat on your tray so you can remove the bites without touching the tray surface.
Mistake 3: Freezing or melting at the wrong time and ending with poor texture
Bananas that are frozen rock-hard before you add toppings can crack or cause the chocolate to shatter instead of forming a smooth shell. Conversely, adding chocolate while the bananas are too soft will cause toppings to sink or the peanut butter to mix into the banana and become messy. I aim to pre-freeze until firm but still slightly yielding (about 15–20 minutes) and work fairly quickly when spreading peanut butter and drizzling chocolate so the structural balance stays right.
Serving Suggestions for Low Calorie Frozen Banana Snickers
These little bites are versatile — they work as a dessert, a post-workout reward, or a kid-safe snack. Below are a few practical and balanced serving ideas that fit everyday gluten-free life.
I usually serve these as part of a small plated treat alongside fresh fruit or a dairy or dairy-free yogurt for a rounded snack. They’re easy to pack for a gluten-free picnic or to top a bowl of porridge for a dessert-like finish.
Pair with protein or yogurt for a balanced snack
Serve 2–3 banana bites next to a small bowl of plain Greek yogurt or a dairy-free yogurt to add extra protein and make the snack more satisfying. A drizzle of the same melted chocolate over the yogurt ties the plate together and keeps things simple.
Make a kid-friendly dessert plate
Arrange 2–4 bites with slices of apple and a few carrot sticks. Kids love the novelty of the frozen chocolate top, and combining them with fresh fruit increases fiber and variety. For school lunches, pack in a frozen cooler pack to keep them firm until snack time.
Use as a topping or mix-in
Chop a few frozen bites to use as a garnish for gluten-free oatmeal, chia pudding, or smoothie bowls. Because they’re already portioned and frozen, they’re handy to sprinkle on top for texture and a candy-like finish without processed sugars or refined ingredients.

Conclusion
I hope this Low Calorie Frozen Banana Snickers recipe gives you a simple, reliable way to enjoy a sweet, satisfying treat while staying true to a gluten-free lifestyle. It’s flexible, quick to prepare, and easy to scale for family gatherings or meal prep. If you’d like a visual reference or a slightly different take on the same idea, I also find it useful to compare methods and plating inspiration — here’s one helpful version: Frozen Banana Snickers Recipe – Jar Of Lemons. Try a small batch first, and then make adjustments to toppings and portion size so the recipe fits your tastes and dietary needs. I’m cheering you on — enjoy making these safe, tasty bites for yourself and your family.
FAQs About Low Calorie Frozen Banana Snickers
Low Calorie Frozen Banana Snickers can be safe for people with celiac disease if every ingredient is verified gluten-free and cross-contact is prevented during preparation. I recommend using chocolate chips, peanut butter, and any add-ins that are explicitly labeled “certified gluten-free,” cleaning surfaces and utensils, and storing the finished bites separately from gluten-containing foods.
Yes. You can substitute sunflower seed butter, almond butter, or tahini for peanut butter and use chopped almonds or pumpkin seeds instead of peanuts. Make sure the alternatives are labeled gluten-free and, if allergies are a concern, produced in allergy-aware facilities.
Stored in a single layer or in a freezer-safe container with parchment between layers, Low Calorie Frozen Banana Snickers keep well for up to 2 weeks for best texture. Beyond that, they remain edible but can become icier and the chocolate may dull in flavor. Label the container with the date so you rotate older treats first.
Absolutely. These are great for advance prep. Make them the day before or up to a week ahead and store in a well-sealed freezer-safe container. If you’re serving at a party, move them to the fridge about 10–15 minutes before serving so they soften slightly without melting.
If chocolate seizes while melting (becomes grainy and lumpy), it usually means too much water got in or it overheated. I avoid this by melting in short bursts, stirring frequently, and using a teaspoon of coconut oil to smooth it. If it seizes, you can sometimes rescue small amounts by adding a little more warm coconut oil or using it as a chunkier topping rather than a smooth coating. Always use a dry, clean bowl and spoon to melt chocolate to prevent water contact.
Low Calorie Frozen Banana Snickers
Ingredients
Method
- Prepare your workspace and tools by washing countertops and utensils.
- Line a baking sheet with parchment paper or a silicone mat.
- Peel the bananas and slice them into thick coins about 1/2 inch thick.
- Arrange the banana coins in a single layer on the baking sheet and freeze for 15-20 minutes.
- Measure the peanut butter and chop the peanuts.
- Prepare any optional add-ins.
- Spread about 1/2 teaspoon of peanut butter on each banana coin.
- Sprinkle each coin with chopped peanuts and sea salt, if desired.
- Melt the chocolate and coconut oil together until smooth.
- Drizzle the melted chocolate over each banana bite or dip the tops into the chocolate.
- Return the tray to the freezer for 30-60 minutes until the chocolate is set.
- Let the bites sit at room temperature for about 5 minutes before serving.
- Store leftovers in a freezer-safe container for up to 2 weeks.