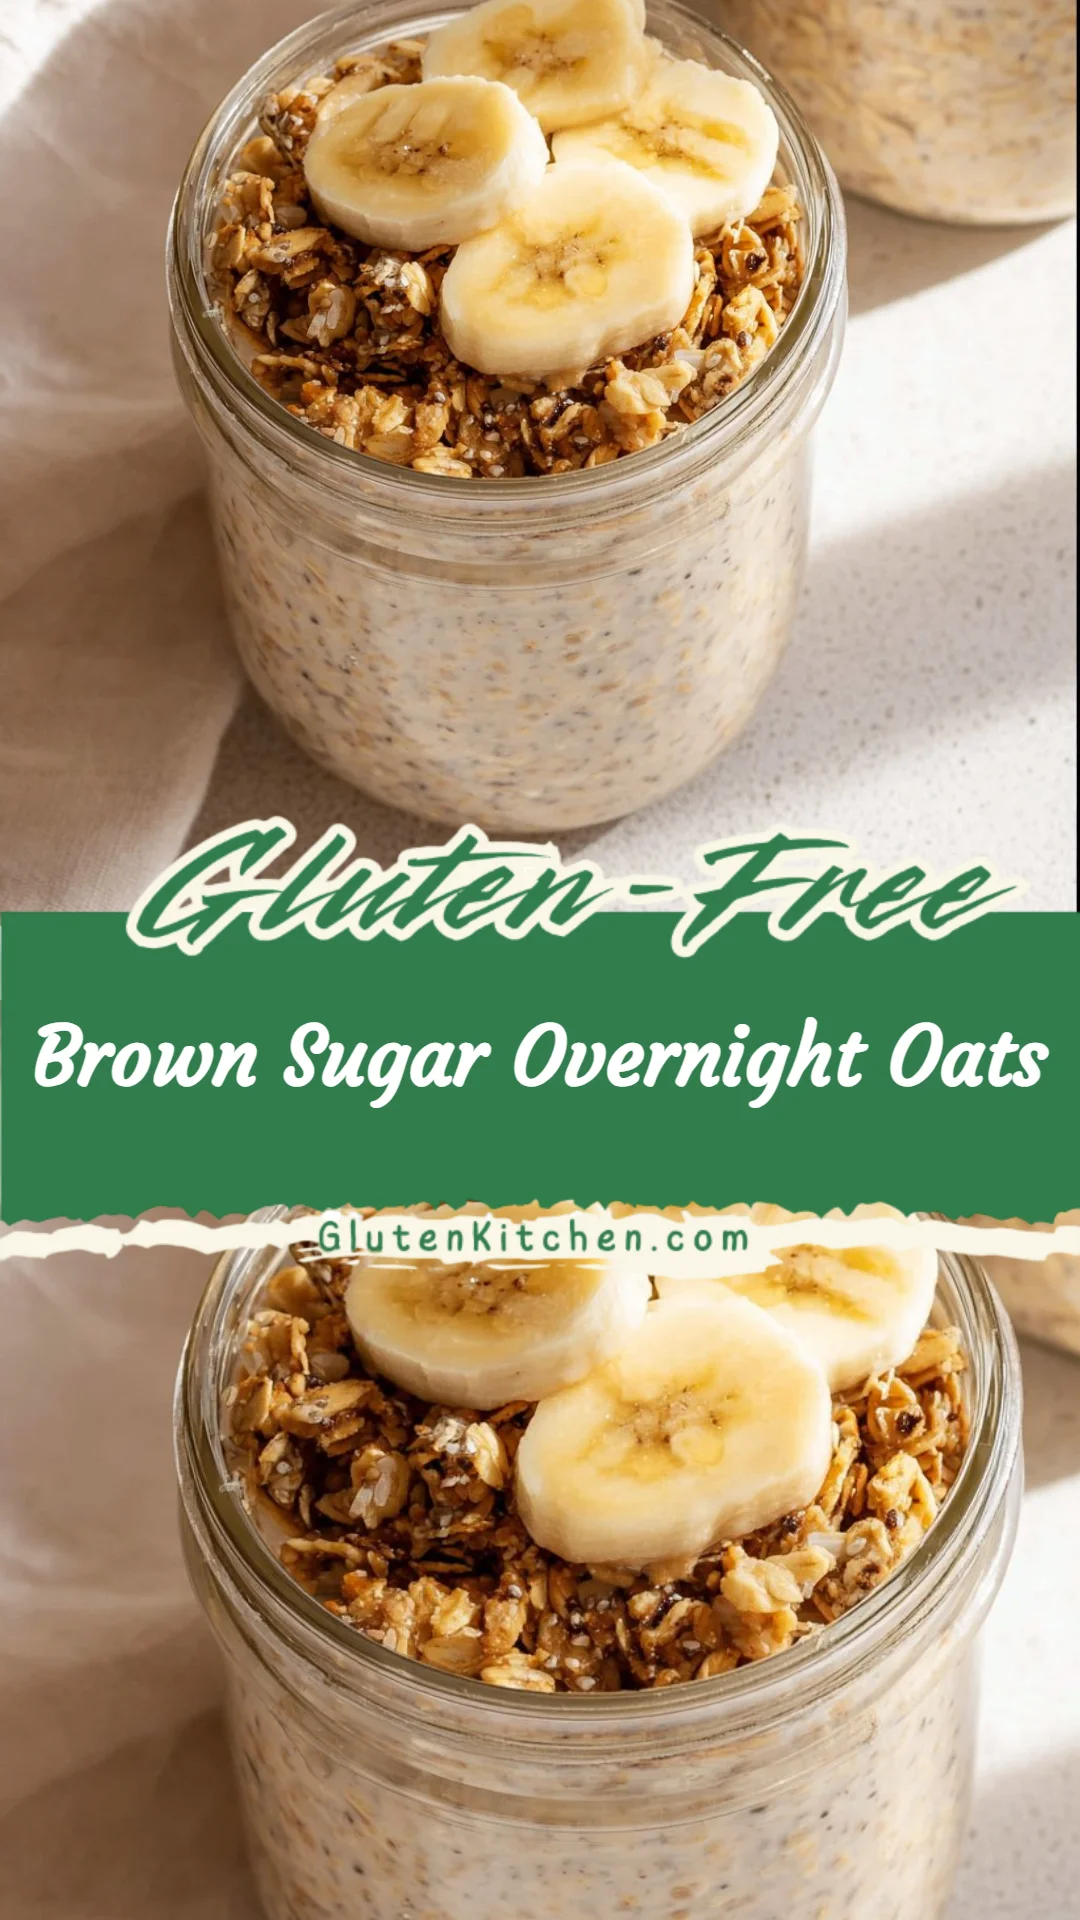
Brown Sugar Overnight Oats
Start Here
I know how comforting it is to find a simple, reliable breakfast that keeps me feeling well and confident about what I eat—especially when I’m managing gluten intolerance or celiac disease. Hidden gluten, confusing labels, and cross-contamination are real worries, so I choose recipes that are naturally gluten-free or use certified gluten-free ingredients. This Brown Sugar Overnight Oats recipe is nourishing, easy to make ahead, and safe when you use certified gluten-free oats and checked labels; if you want more gluten-free baking inspiration, I also like this gluten-free strawberry sugar cookies recipe for an occasional treat: gluten-free strawberry sugar cookies.
A Quick Look at This Brown Sugar Overnight Oats Recipe
This Brown Sugar Overnight Oats delivers fiber from rolled oats and chia seeds and a bit of protein when you choose milk or add Greek yogurt or nut butter at serving time. The mashed banana and brown sugar give natural sweetness and a caramel-like flavor, while vanilla and cinnamon add warm notes without extra fuss. Use certified gluten-free rolled oats to keep this recipe safe for celiac disease and gluten sensitivity. It’s a great make-ahead breakfast for busy mornings, easy to scale for family breakfasts, and fits well into a gluten-free meal-prep routine.
Ingredients You’ll Need for Brown Sugar Overnight Oats
Below I’ll break the ingredients into essentials, optional add-ons, and gluten-free substitutions so you can shop confidently and adapt the recipe to what you have on hand.
Essentials
- 2 cups rolled oats — Use certified gluten-free rolled oats. Oats are naturally gluten-free but often cross-contaminated, so look for the “certified gluten-free” label.
- 4 tablespoons chia seeds — Adds fiber and helps thicken the oats; naturally gluten-free.
- 3–4 tablespoons brown sugar — For sweetness and that molasses-like flavor. You can reduce the amount if you prefer less sweet.
- 1 cup mashed banana (about 2 ripe bananas) — Adds sweetness, moisture, and texture.
- 1 teaspoon vanilla extract — Use a gluten-free brand; pure vanilla extract is typically gluten-free, but confirm labels if concerned.
- 1 pinch salt — Balances the sweetness.
- 1/4 teaspoon cinnamon (optional) — Adds warmth and pairs beautifully with banana and brown sugar.
- 2 cups milk (dairy or plant-based) — Any unsweetened plant milk (almond, oat*, soy, coconut) or dairy milk is fine; choose unsweetened to control sugar. If using oat milk, make sure it’s certified gluten-free if you need strict gluten control.
- Toppings (optional): Nuts and seeds, fresh fruit, nut butter, Greek yogurt, cocoa nibs or dark chocolate, coconut flakes, maple syrup — All optional and must be checked for gluten-free labeling, especially processed toppings like chocolate or flavored yogurts.
Optional Add-ons
- Greek yogurt (plain or vanilla) — Adds creaminess and extra protein at serving time; check labels for gluten-free certification.
- Nut butter (peanut, almond, cashew) — Swirl for flavor and protein; choose single-ingredient nut butters without additives that may contain gluten.
- Protein powder (gluten-free) — If you want to bump protein, use a certified gluten-free powder.
- Seeds (pumpkin, hemp) — For added crunch and nutrition.
- Unsweetened cocoa powder — For a chocolate twist; pure cocoa is gluten-free.
- Zest (orange or lemon) — Brightens flavor.
- Toasted coconut flakes or chopped nuts — For texture.
Substitutions and Gluten-Free Adjustments
- Rolled oats → Certified gluten-free rolled oats only. Do not use generic oats unless they are labeled gluten-free.
- Milk → Any dairy or plant milk works. If using oat milk, verify it’s certified gluten-free if you require strict avoidance.
- Brown sugar → Coconut sugar or maple syrup can be used; if using maple syrup, reduce the milk slightly to keep texture. (Maple syrup is naturally gluten-free.)
- Banana → Unsweetened applesauce (same volume) or pear puree can work, though flavor and texture will vary.
- Chia seeds → Ground flaxseed can be a substitute for texture and omega-3s; it absorbs liquid slightly less, so experiment with amounts.
- Greek yogurt → Use dairy-free, plant-based yogurt labeled gluten-free for a dairy-free option.
Highlight: Ingredients that should be certified gluten-free when relevant — rolled oats, oat milk, protein powders, flavored yogurts, and processed toppings (chocolate, granola, flavored nut butters). Always read labels and look for “certified gluten-free” when you need strict gluten avoidance.
Ingredient alternatives for allergies or availability
I want this recipe to be flexible for food allergies and pantry limits while keeping it 100% gluten-free. Here are safe swaps and notes on hidden gluten sources.
- Dairy-free swap: Use unsweetened almond, soy, rice, or coconut milk. If you’re choosing oat milk, pick a brand with a certified gluten-free label.
- Nut-free swap: Use soy yogurt or sunflower seed butter as toppings instead of nut butter. Seeds like hemp or pumpkin add similar texture without nuts.
- Sugar swap: If brown sugar isn’t an option, use coconut sugar, date syrup, or maple syrup. Keep in mind that any commercial syrup or sugar blend should be checked for added ingredients; pure maple syrup is naturally gluten-free.
- Chocolate or cocoa: Pure cocoa powder and chocolate chips labeled gluten-free are safe. Some chocolate products are processed on shared equipment, so check labels.
- Packaged toppings: Granola and flavored coconut flakes often contain gluten or are processed on shared lines—only use items labeled gluten-free.
Notes on avoiding hidden gluten sources:
- Vanilla extract: Pure vanilla is usually safe, but imitation vanilla and some flavorings can contain additives—read labels.
- Protein powders and meal boosters: Many contain added maltodextrin or flavorings that could be derived from gluten-containing grains—choose those labeled gluten-free.
- Pre-flavored milks and yogurts: These can contain thickeners or flavorings with gluten—opt for plain varieties and flavor them yourself with fruit or spices.
How to Make Brown Sugar Overnight Oats Step-by-Step
I’ll walk you through this in straightforward steps. These instructions are beginner-friendly and include practical gluten-free safety tips.
- Measure and mix the dry base. In a large, clean mixing bowl or a 1-quart jar, combine 2 cups certified gluten-free rolled oats and 4 tablespoons chia seeds. Stir to distribute the chia seeds evenly. Use a clean spoon or utensil dedicated to gluten-free prep to avoid cross-contamination.
- Add the sweeteners and spices. Mix in 3–4 tablespoons brown sugar (adjust to taste), 1 pinch salt, and 1/4 teaspoon cinnamon if using. Taste the dry mix—this helps you adjust sweetness before adding the milk.
- Mash the bananas. Place about 1 cup mashed ripe banana (roughly 2 bananas) into a small bowl and mash until mostly smooth. Some small chunks are fine and add texture. Ensure the surface or cutting board you used for the bananas was free from gluten crumbs—wash utensils between uses if you also prepare gluten-containing foods.
- Combine wet ingredients. Add the mashed banana, 1 teaspoon vanilla extract, and 2 cups milk (dairy or plant-based) to the oat-chia mixture. Stir well until everything is evenly combined; the chia seeds will start to absorb liquid.
- Transfer and seal. If you mixed in a bowl, divide the mixture into individual jars or into a single airtight container. Cover tightly. If using glass jars, screw-on lids are ideal for transport and portioning.
- Refrigerate. Place the covered oats in the refrigerator for at least 4 hours, ideally overnight. Chia seeds and oats will thicken as they absorb liquid. Refrigeration also keeps everything safe and fresh.
- Check texture and adjust. When ready to eat, stir the oats. If they’re too thick, add a splash of milk and stir to loosen. If too thin (rare), stir in an extra tablespoon of chia seeds and let sit 10–15 minutes.
- Serve with toppings. Add optional toppings such as fresh fruit, nuts, seeds, a dollop of Greek yogurt, nut butter, or a sprinkle of cocoa nibs. Use clean utensils and bowls that haven’t been used with gluten-containing foods to prevent cross-contact.
Gluten-free safety tips I follow:
- Always use certified gluten-free oats and check labels on packaged toppings.
- Keep a clean prep area: wipe surfaces and use separate utensils if your kitchen handles gluten-containing ingredients regularly.
- Store overnight oats in clean, labeled containers in the fridge for safe portioning and transport.
Common Mistakes to Avoid
Keeping your kitchen safe from cross-contamination while getting great flavor and texture is my priority. Here are common pitfalls I see and how to avoid them.
I’ll point out three specific mistakes that affect gluten exposure, texture, and final quality.
Mistake 1: Using non-certified oats or ignoring labels
Assuming all oats are gluten-free is risky. Regular oats are often processed near wheat, barley, or rye and can be contaminated. Always buy oats marked “certified gluten-free.” The same goes for oat milk, flavored yogurts, and packaged toppings—check labels and allergen statements.
Mistake 2: Wrong texture—too watery or too thick
Over- or under-hydrating your oats makes the difference between a pleasant breakfast and a disappointing one. If your oats are watery, reduce the milk next time or add more chia seeds. If they’re too thick, stir in a little extra milk before serving. Measure carefully and adjust slowly—small changes make big differences.
Mistake 3: Cross-contamination from shared utensils or jars
Even a tiny crumb can cause a reaction for someone with celiac disease. Don’t use a spatula that’s been used with gluten-containing batter, and avoid storing oats in containers that previously held gluten foods unless they’ve been thoroughly washed. I keep a set of dedicated jars and spoons for gluten-free meal prep to simplify this.
Serving Suggestions for Brown Sugar Overnight Oats
This recipe is versatile and fits into many realistic, balanced gluten-free breakfasts. Here are practical serving ideas that make it satisfying and nutritious.
I like to think of the oats as a base you can dress up depending on the day—simple for busy mornings, more substantial when you have time.
Breakfast bowl: Balanced and filling
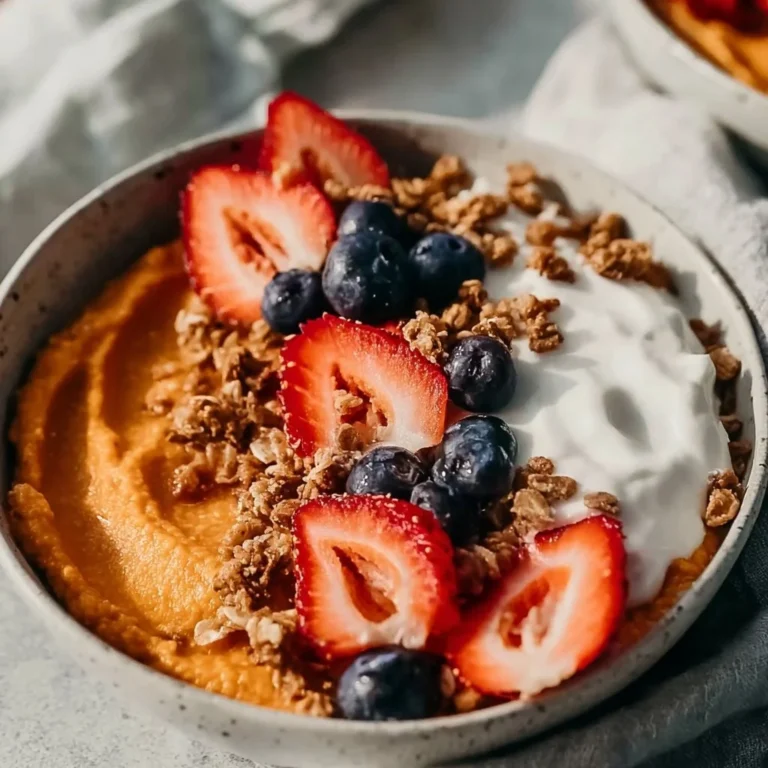
Top your overnight oats with a spoonful of Greek yogurt, a handful of berries, and a scattering of chopped nuts or pumpkin seeds for a balanced meal with protein, fiber, and healthy fats.
On-the-go jars: Easy mornings
Portion the oats into individual jars the night before, add a lid, and grab one on your way out. Include a small container of nut butter or seeds to add just before eating so the texture stays fresh.
Family-style: Customize for everyone
Make a big batch and set out bowls of toppings—sliced banana, berries, nut butter, shredded coconut, and cocoa nibs—so family members can personalize their bowls. This keeps the main preparation simple while letting everyone choose textures and flavors they like.
Conclusion
I hope you feel encouraged to try this Brown Sugar Overnight Oats recipe as a reliable, gluten-free breakfast that’s easy to prepare and adapt. It supports a safe gluten-free lifestyle when you choose certified gluten-free oats and check labels for packaged ingredients. For another twist on the flavor profile and more inspiration, I like this maple and brown sugar overnight oats recipe which highlights a similar comforting sweetness with maple notes.
FAQs About Brown Sugar Overnight Oats
Q1: Are Brown Sugar Overnight Oats safe for people with celiac disease?
Yes — Brown Sugar Overnight Oats are safe for people with celiac disease when you use certified gluten-free rolled oats and ensure all other packaged ingredients (milk, yogurt, chocolate, protein powders) are labeled gluten-free. I always check labels and avoid shared utensils or surfaces that might have gluten crumbs.
Q2: Can I make Brown Sugar Overnight Oats nut-free or dairy-free?
Absolutely. For nut-free, skip nut butter and use seed-based toppings like sunflower seed butter or hemp seeds. For dairy-free, choose unsweetened plant-based milks (almond, soy, or coconut). If you need strict gluten control, ensure any oat milk or plant-based products are certified gluten-free.
Q3: How long do Brown Sugar Overnight Oats keep in the fridge?
Stored in an airtight container, Brown Sugar Overnight Oats typically keep well for up to 4–5 days. I label jars with the date so I know when they were made. If you add fresh fruit toppings, consider adding those right before eating to keep the texture pleasant.
Q4: Can I freeze Brown Sugar Overnight Oats?
You can freeze portions, but the texture may change slightly on thawing because of the chia and oats. I usually refrigerate for up to five days; if I plan to freeze, I portion into freezer-safe containers and thaw overnight in the fridge before eating.
Q5: How can I make Brown Sugar Overnight Oats higher in protein?
To increase protein, stir in a scoop of certified gluten-free protein powder, add a dollop of Greek yogurt at serving time, or top with nut butter. Be sure any protein powders or flavored yogurts are labeled gluten-free to maintain safety.

Brown Sugar Overnight Oats
Ingredients
Method
- In a large mixing bowl or a 1-quart jar, combine the rolled oats and chia seeds. Stir to ensure the chia seeds are evenly distributed.
- Mix in the brown sugar, salt, and optional cinnamon. Taste the mixture to adjust sweetness.
- In a small bowl, mash the ripe bananas until mostly smooth, leaving some small chunks for texture.
- Add the mashed bananas, vanilla extract, and milk to the oat-chia mixture. Stir well to combine.
- Transfer the mixture into individual jars or a single airtight container. Cover tightly.
- Refrigerate for at least 4 hours, ideally overnight, to allow the oats and chia seeds to absorb the liquid.
- When ready to eat, stir the oats. If too thick, add a splash of milk. Add optional toppings such as fresh fruit, nuts, or yogurt before serving.