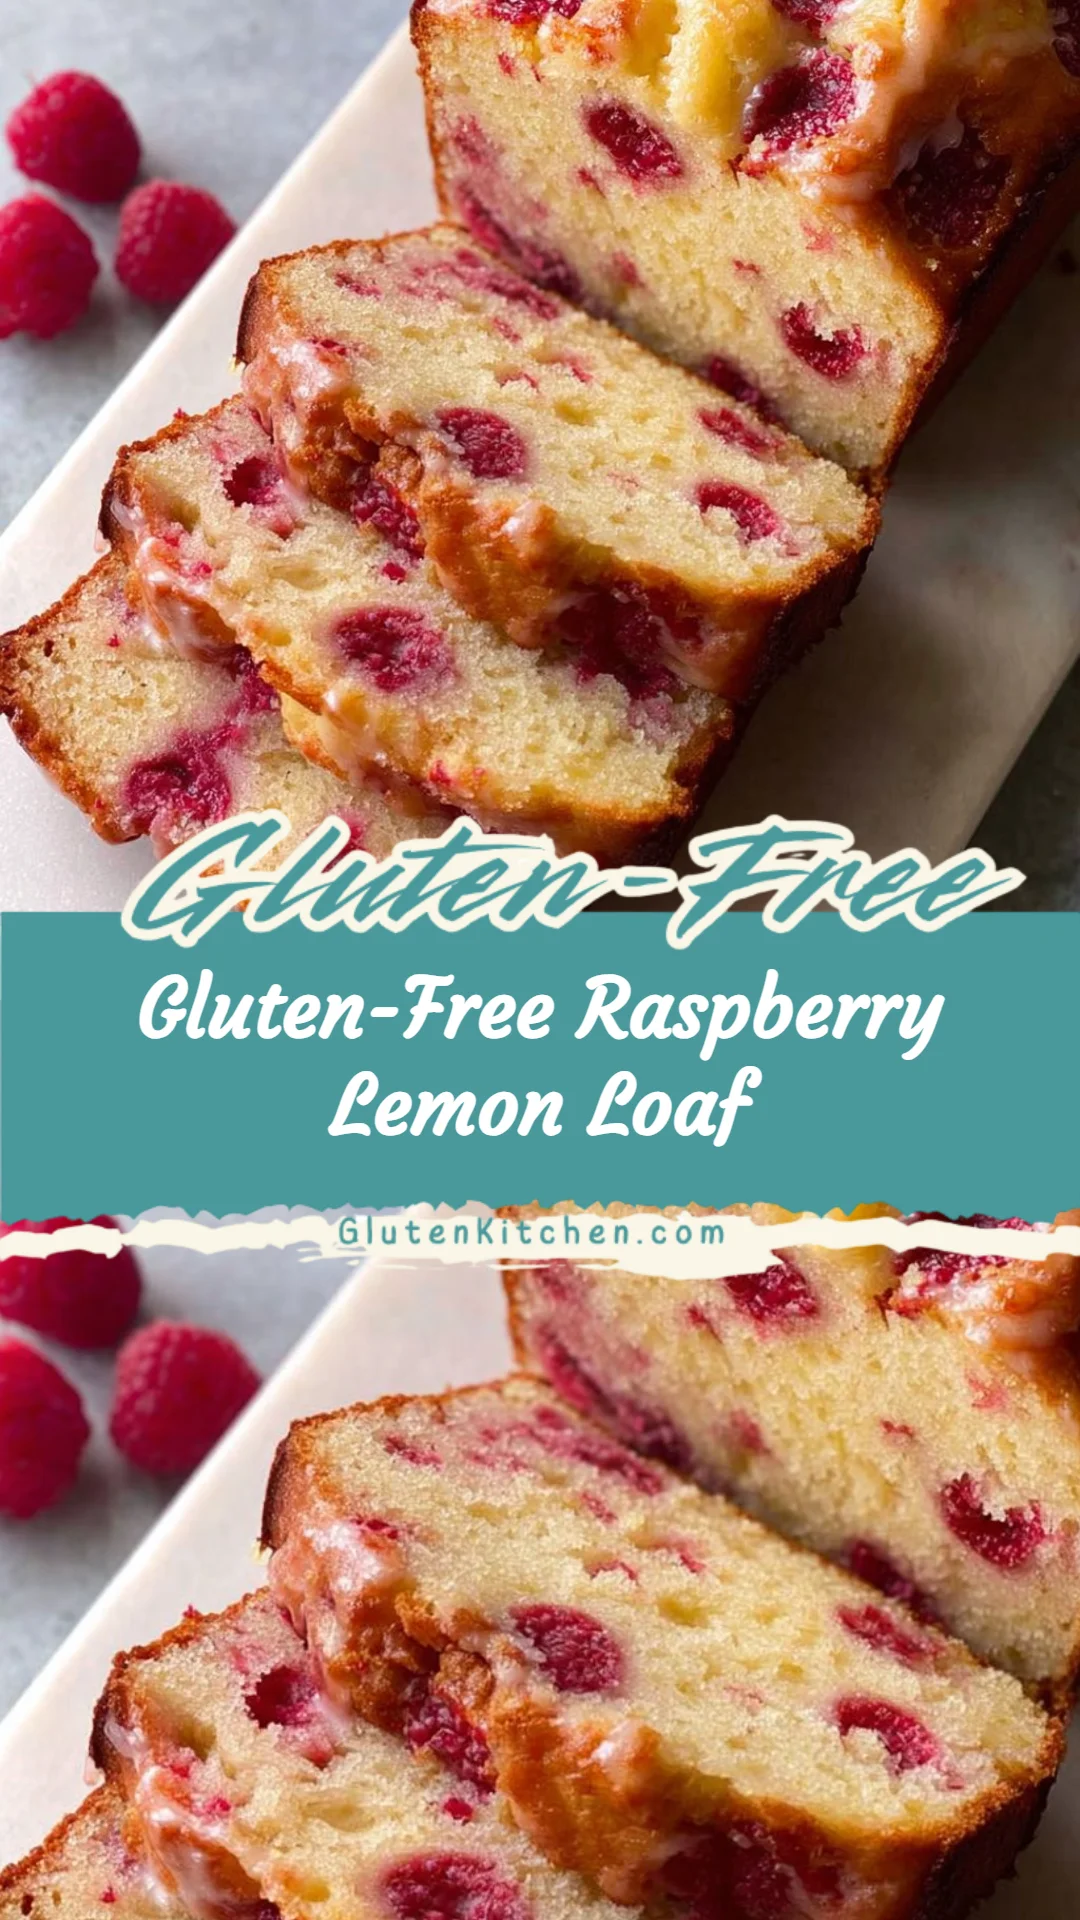
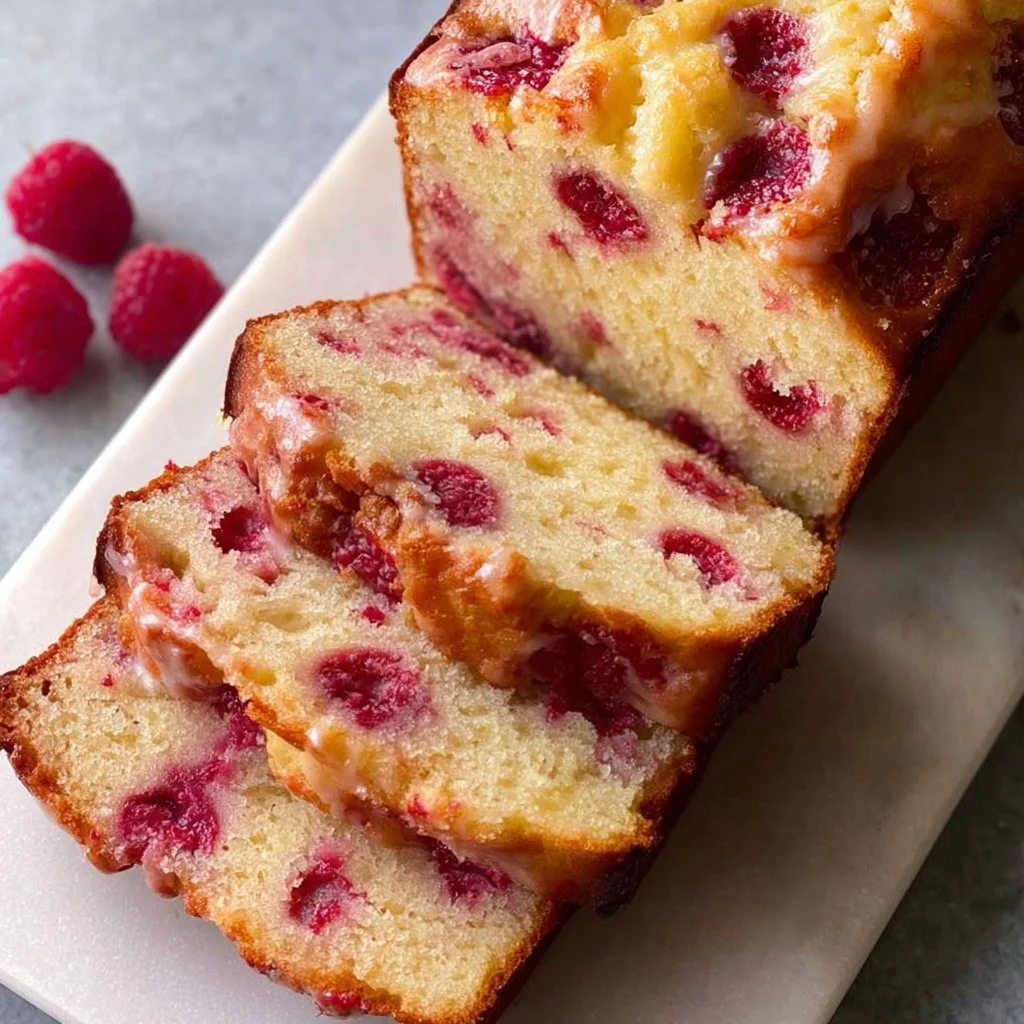
Gluten-Free Raspberry Lemon Loaf
Do you ever crave something bright and lemony that makes the kitchen smell like sunshine — the kind of treat that sparks a cozy memory of grandma’s bakery or a picnic blanket under a lemon tree? I’ll admit, I once nervously attempted my first loaf of gluten-free quick bread and learned that patience (and a good loaf pan) matters more than perfection. For beginners, working with gluten-free flour blends can feel fiddly, but this Gluten-Free Raspberry Lemon Loaf is forgiving, straightforward, and full of homey flavor; if you like warm gluten-free treats, you might also enjoy my take on crispy, chewy gluten-free churros. Relax — this recipe is built for busy home cooks and first-timers, and I’ll walk you through each step.
A Quick Look at This Gluten-Free Raspberry Lemon Loaf Recipe
This loaf combines two main flavor stars: fresh raspberries and bright lemon (juice + zest). It uses a gluten-free all-purpose flour blend that already contains xanthan gum, so the texture stays tender and bakes up nicely. The benefit is comfort with a light citrus note — a sweet treat that still feels fresh and not too heavy. It’s a simple mix-and-fold batter that’s great for beginners because the method is forgiving and the resting step helps hydrate the flour for a better crumb. Keep reading for tips on substitutions, how to avoid collapsing berries, and a silky lemon glaze to finish.
Ingredients You’ll Need for Gluten-Free Raspberry Lemon Loaf
Essentials
- 2 cups gluten-free all-purpose flour (with xanthan gum included) — This forms the base and keeps the loaf tender. Make sure your blend is a 1:1 replacement for regular flour.
- 1 tablespoon gluten-free baking powder — For lift and a light crumb.
- 1/2 teaspoon salt — Balances the sweetness and enhances flavor.
- 3/4 cup granulated sugar — Gives sweetness and helps with browning.
- 8 tablespoons butter (1 stick) or dairy-free alternative, melted and slightly cooled — Adds moisture and richness.
- 1/2 cup plain Greek yogurt or dairy-free Greek yogurt — For tang, moisture, and a lovely tender crumb.
- 3 large eggs, room temperature — Eggs provide structure and lift; bring them to room temperature for even mixing.
- 1 tablespoon fresh lemon juice — Uses fresh lemon for brightness in the batter (plus more for syrup/glaze).
- 2 packed teaspoons freshly grated lemon zest — Zest gives an intense, aromatic lemon flavor.
- 1 teaspoon vanilla extract — Rounds out the citrus and berry flavors.
- 1 teaspoon lemon extract — Optional for an extra lemon boost; if you prefer a subtler lemon, you can omit or reduce.
- 1 1/2 cups fresh raspberries — Fresh berries are tender and juicy; they hold up nicely when folded carefully into the batter.
For the lemon simple syrup:
- 1 tablespoon lemon juice
- 1 tablespoon granulated sugar
For the lemon glaze:
- 2 tablespoons lemon juice
- 1 cup confectioners (powdered) sugar
Optional add-ons
- Extra raspberries to dot the top before baking — Pretty and gives an extra burst of flavor.
- A tablespoon of poppy seeds — If you want a blueberry/raspberry lemon loaf vibe, poppy seeds add texture and visual interest.
- 1/4 cup chopped toasted almonds or pistachios — Sprinkle over glaze for crunch.
- A teaspoon of almond extract (in place of or along with lemon extract) — Adds a warm, nutty note.
- 2 tablespoons sour cream instead of yogurt — Slightly different tang and texture (still great).
Substitutions and shortcuts
- Flour: If your all-purpose GF blend doesn’t contain xanthan gum, add 1 teaspoon xanthan gum to the 2 cups of flour. If you only have a different brand or homemade blend, check protein content; stick to blends labeled for 1:1 substitution to avoid dryness or crumbliness.
- Yogurt: Use dairy-free yogurt or sour cream for a dairy-free loaf.
- Butter: Use melted coconut oil or a plant-based stick butter for dairy-free baking; measure solid fats at room temperature where needed or melt and cool slightly as directed.
- Eggs: For an egg-free version, try a commercial egg replacer per package instructions or 3 tablespoons aquafaba (chickpea liquid) whipped to foamy peaks — note texture will vary.
- Raspberries: If fresh raspberries aren’t available, use frozen raspberries straight from the freezer, but do not thaw; toss them in a little flour first to prevent streaking in the batter.
- Lemon extract: If you don’t have lemon extract, omit it and increase zest by an extra 1/2 teaspoon; fresh lemon juice and zest are key.
- Shortcut for powdered sugar glaze: If you’re in a hurry, use store-bought lemon icing but look for one with fewer additives for better flavor.
How to Make Gluten-Free Raspberry Lemon Loaf Step-by-Step
I’ll walk you through each step the way I do in my kitchen — relaxed and precise, so you get the best possible loaf every time.
- Prep and measure
- Preheat your oven to 375°F (190°C) toward the end of your resting time, but don’t start baking yet. Line a 10-inch loaf pan with parchment paper so you can pull the loaf out easily, or grease and lightly flour the pan with gluten-free flour.
- Measure ingredients accurately. Spoon and level the gluten-free flour into the measuring cup rather than scooping, which can compact it and give a dry loaf.
- Whisk the dry ingredients
- In a large mixing bowl, whisk together 2 cups gluten-free all-purpose flour (with xanthan gum), 1 tablespoon gluten-free baking powder, and 1/2 teaspoon salt until evenly combined. Whisking helps aerate the mix so the loaf can rise uniformly. Set this bowl aside.
- Combine the wet ingredients
- In a separate medium bowl, lightly beat the 3 large eggs just to combine the yolks and whites.
- Add 3/4 cup granulated sugar and whisk until the mixture looks a bit pale and slightly glossy — this helps dissolve the sugar and integrate with the eggs.
- Stir in the 8 tablespoons melted butter (cooled slightly so it doesn’t cook the eggs), 1/2 cup plain Greek yogurt, 1 tablespoon fresh lemon juice, 2 packed teaspoons lemon zest, 1 teaspoon vanilla extract, and 1 teaspoon lemon extract. Mix until the wet ingredients are smooth and well combined. The yogurt will add a creamy texture without weighing the batter down.
- Combine wet and dry
- Pour the dry flour mixture into the wet ingredients. Stir gently but thoroughly for about 1 minute until the batter is smooth and uniform. Don’t overmix — you want everything incorporated but not beaten into a dense mass.
- Fold in the raspberries
- Gently fold 1 1/2 cups fresh raspberries into the batter using a spatula. Use careful strokes to fold so the berries don’t break up and turn the batter pink. If you want a marbled look, fold less; if you want even distribution, fold a bit more carefully. Reserve a handful of raspberries for the top if you like.
- Rest the batter
- Cover the bowl with plastic wrap (or a clean tea towel) and let the batter rest at room temperature for 20 minutes. This rest hydrates the gluten-free flour blend and helps create a more tender crumb and better rise. Resist the urge to skip this; it’s a quiet trick for successful GF baking.
- Transfer to the loaf pan
- Spoon the batter into your prepared 10-inch loaf pan and spread it evenly with a spatula. Tap the pan gently on the counter once or twice to level it and release large air pockets. Arrange extra raspberries on top if using — they make the loaf prettier and give a fresh pop.
- Bake the loaf
- Place the loaf in the preheated oven and bake uncovered for 40–45 minutes. The top should become golden during this time. If you see rapid browning before the loaf is set, tent it loosely with foil.
- After 40–45 minutes, if the top is golden and springs back lightly when touched, loosely cover with foil and continue baking for an additional 10–15 minutes. Insert a toothpick into the center; it should come out clean or with a few moist crumbs, but not wet batter.
- Make the lemon simple syrup while it bakes
- In a small bowl, mix 1 tablespoon lemon juice with 1 tablespoon granulated sugar until the sugar dissolves. This syrup will be brushed on while the loaf is hot to add shine and extra lemon flavor.
- Brush with syrup and cool
- As soon as the loaf is out of the oven, brush the top generously with the lemon simple syrup. The heat will help the syrup soak into the crumb, keeping the loaf moist and adding a glossy finish.
- Let the bread cool in the pan for at least 30 minutes. This rest helps it firm up so it doesn’t fall apart when you remove it.
- Remove and cool completely
- After the partial cool in the pan, lift the loaf out using the parchment paper and place it on a wire rack to cool completely. This is important before glazing; a warm loaf will make the glaze run off.
- Make and drizzle the lemon glaze
- In a small bowl, whisk together 1 cup confectioners (powdered) sugar and 2 tablespoons lemon juice until smooth and pourable. Add more powdered sugar to thicken or a splash more lemon juice to thin as needed.
- Drizzle the glaze over the cooled loaf using a spoon or small piping bag. Let the glaze set for a few minutes before slicing.
- Slice and enjoy
- Use a serrated knife for clean slices. Serve at room temperature or warmed lightly for a cozy treat. Store in an airtight container for up to 3 days at room temperature or refrigerate up to a week.
Tips from my kitchen
- Room-temperature eggs mix more easily and give a more homogenous batter.
- If your raspberries are very ripe and juicy, fold them in last and be extra gentle.
- For even slices, chill the loaf briefly (10–15 minutes) to firm it up before slicing.
Common Mistakes to Avoid
Baking gluten-free can feel like a science experiment at times, but most common issues are easy to fix once you know what to watch for. Below are three frequent missteps and how I avoid them in my kitchen.
Mistake 1: Overmixing the batter
Overmixing can lead to a dense or gummy texture, especially with gluten-free flours. Stir just until the ingredients are combined and the batter is smooth — about a minute when you add the dry ingredients. Gentle folding for the raspberries keeps the loaf tender.
Mistake 2: Skipping the batter rest
A common beginner skip is the 20-minute resting step. This step hydrates the flour and helps the loaf rise more evenly. Don’t skip it; it’s a small wait for a much better crumb.
Mistake 3: Adding raspberries directly from freezer without preparation
If you use frozen raspberries and toss them straight into the batter, they can bleed and make the loaf very wet in spots. Keep them frozen and toss them in a tablespoon of flour before folding them into the batter to reduce streaking and sinking.
Serving Suggestions for Gluten-Free Raspberry Lemon Loaf
This loaf is lovely on its own with a cup of tea, but it’s also quite versatile — I like to think of it as a little celebration cake disguised as quick bread.
- H3: Cozy Breakfast
- Slice and serve with a smear of softened butter or a spoonful of ricotta and a drizzle of honey. It pairs wonderfully with a milky latte or a bright Earl Grey.
- H3: Afternoon Tea or Snack
- Plate with a dollop of whipped cream or a scoop of vanilla ice cream for a simple dessert. The tart raspberries and lemon glaze balance sweet cream beautifully.
- H3: Brunch Centerpiece
- Serve slices alongside a fruit salad and a light frittata for a brunch spread. The loaf’s lemon brightness cuts through savory flavors nicely and looks lovely on a brunch table.
Conclusion
I promise this Gluten-Free Raspberry Lemon Loaf is easier than it looks — the technique is simple and the rest time does a lot of the work for you. I love how customizable it is: switch dairy/dairy-free ingredients, fold in different berries, or add poppy seeds to make it your own. If you’d like a printable reference or another take on this loaf, you can compare flavor ideas with the original Gluten-Free Raspberry Lemon Loaf Recipe | healthyGFfamily.com which inspired my version. Now, preheat the oven and let the lemony love fill your kitchen — then come back and tell me how it turned out.
FAQs About Gluten-Free Raspberry Lemon Loaf
Yes — you can bake the loaf a day ahead, store it well-wrapped at room temperature for 1–2 days, and add the glaze just before serving for best presentation. Refrigerate if your kitchen is warm; bring to room temperature before serving.
Absolutely. Keep frozen raspberries frozen and toss them lightly in a teaspoon or two of gluten-free flour before folding them into the batter; this helps prevent bleeding and keeps the loaf from becoming too wet in places.
Substitute dairy-free yogurt for Greek yogurt and use a dairy-free butter alternative (or coconut oil) in place of butter. The loaf will still be tender and flavorful — use a dairy-free yogurt with similar thickness for best texture.
Yes, if you follow the recipe’s syrup brush step and store the loaf in an airtight container. The lemon simple syrup keeps the crumb moist and flavorful. If storing longer than a day, refrigerate and bring back to room temperature before serving.
You can. Reduce bake time to 18–22 minutes for standard muffin tins, and watch for a golden top and a toothpick to come out clean. Fill muffin cups about two-thirds full and adjust time for mini or jumbo sizes accordingly.
Gluten-Free Raspberry Lemon Loaf
Ingredients
Method
- Preheat oven to 375°F (190°C) and line a 10-inch loaf pan with parchment paper.
- Measure gluten-free flour accurately, spooning and leveling into the measuring cup.
- In a large bowl, whisk together flour, baking powder, and salt.
- In another bowl, lightly beat eggs, then add sugar and whisk until pale and glossy.
- Stir in melted butter, yogurt, lemon juice, lemon zest, vanilla, and lemon extract until smooth.
- Pour dry mixture into wet ingredients and stir gently for about a minute until smooth.
- Fold in raspberries carefully, reserving some for topping if desired.
- Cover the bowl and let the batter rest for 20 minutes.
- Spoon batter into prepared pan and bake for 40–45 minutes until golden.
- Brush with lemon simple syrup immediately after removing from the oven.
- Allow to cool in the pan for at least 30 minutes, then remove to cool completely.
- Whisk together lemon glaze ingredients and drizzle over the cooled loaf.
- Slice and enjoy at room temperature or warmed.