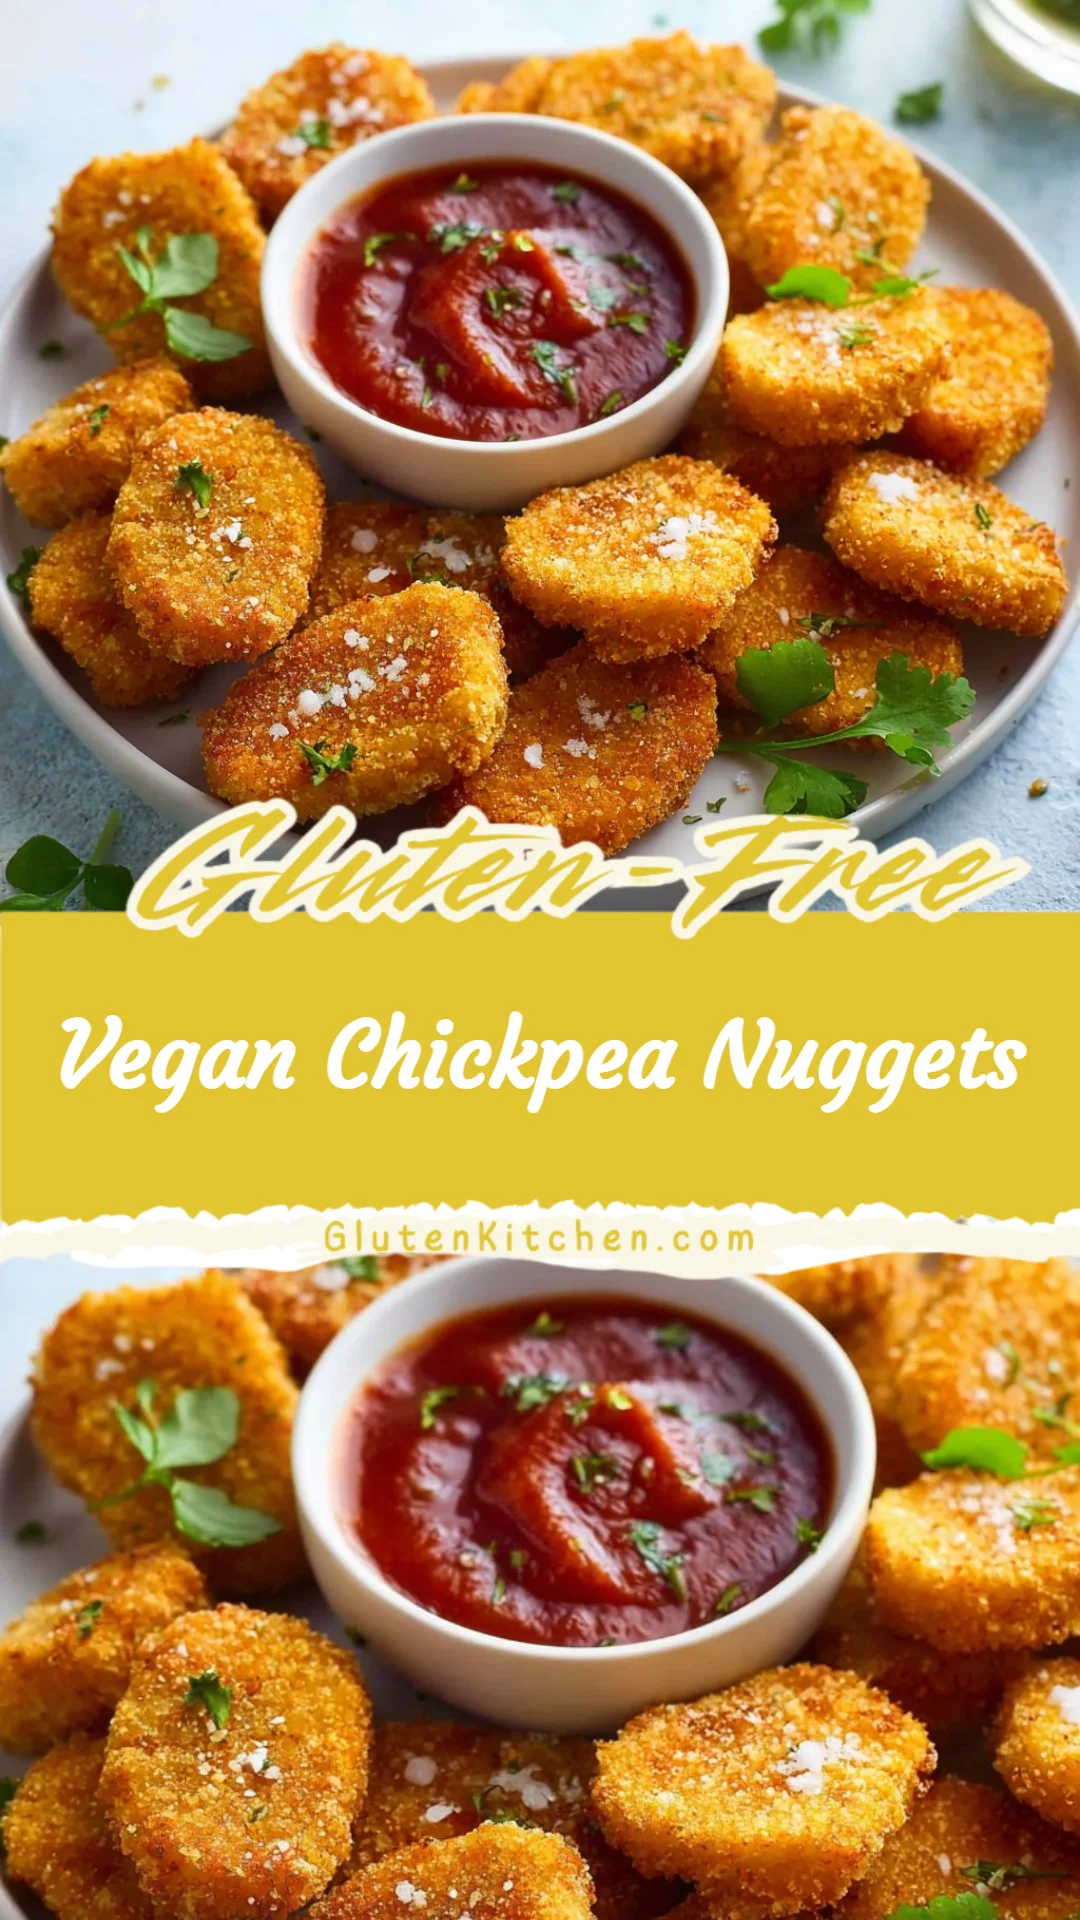
Vegan Chickpea Nuggets
I know how empowering it feels to eat confidently when you or someone you care for needs to avoid gluten. Many of us worry about hidden gluten in processed foods, confusing labels, or cross-contamination in shared kitchens. I developed this Vegan Chickpea Nuggets recipe to be straightforward, nourishing, and safe for gluten-free households — made with simple, naturally gluten-free ingredients and clear precautions so you can enjoy crunchy, protein-rich nuggets without second-guessing your meal.
A Quick Look at This Vegan Chickpea Nuggets Recipe
These Vegan Chickpea Nuggets are a fiber- and protein-rich plant-based snack or meal component, thanks to chickpeas and oats (use certified gluten-free oats). The recipe uses pantry-friendly seasonings like paprika, garlic, and nutritional yeast for a savory, slightly cheesy umami hit without dairy. When you use certified gluten-free oats and check labels on spices and any sauces, these nuggets fit well into a gluten-free lifestyle — they’re family-friendly, suitable for weeknight dinners or batch meal prep, and crisp up nicely in the air fryer for a satisfying texture.
Ingredients You’ll Need for Vegan Chickpea Nuggets
Essentials
- 1 can (about 400 g / 14 oz) chickpeas — drained and rinsed thoroughly (look for no added gluten-containing ingredients)
- 1 cup oat flakes — blended into oat flour (use certified gluten-free oats)
- 1 tsp red pepper powder (paprika or mild chili)
- 1 tsp onion seasoning or onion powder (check label)
- 1 tsp garlic seasoning or garlic powder
- 1/2 tbsp nutritional yeast (preferably labeled gluten-free)
- 1/2 tsp salt
- 1/4 tsp sea salt (divided)
- 1/4 tsp herb mix (dried oregano, thyme, or Italian blend) — check labels
- 1/2 tsp garlic mix (if separate from garlic powder)
- Oil for spraying or brushing (avocado oil recommended — high smoke point and neutral flavor)
Notes:
- Every ingredient above is naturally gluten-free, but oats, nutritional yeast, tamari (if used), and some spice blends can be processed in facilities that handle wheat. I recommend certified gluten-free versions of oats, nutritional yeast, and tamari/soy sauce substitutes to avoid cross-contact.
- Keep an eye on spice blends — some may include anti-caking agents or maltodextrin sourced from wheat in rare cases. When in doubt, choose single-ingredient herbs and spices with clear labeling.
Optional Add-ons
- 1–2 tbsp ground flax or chia (for extra binding and omega-3s)
- 1–2 tbsp sesame seeds or hemp seeds (texture and nutrition)
- 1/4 cup finely grated carrot or zucchini (adds moisture, color, and vitamin variety — squeeze out excess water if using zucchini)
- Smoked paprika (for smoky depth)
- Lemon zest or a squeeze of lemon juice (brightens the flavor)
- Black pepper or cayenne (adjust heat)
- Low-sodium tamari (use certified gluten-free tamari) — adds umami, use sparingly
- Sesame oil (a few drops for flavor, not required for safety)
These add-ons are all gluten-free when sourced carefully — for example, choose sesame seeds and hemp seeds from trusted suppliers and tamari labeled gluten-free.
Substitutions and Gluten-Free Adjustments
- Oats: If you can’t find certified gluten-free oats, substitute 3/4 cup chickpea flour (garbanzo bean flour) or a gluten-free all-purpose flour blend that’s safe for your diet. Note: chickpea flour will give a denser texture.
- Nutritional yeast: If unavailable, a pinch of miso (gluten-free) or extra salt and smoked paprika can help replace the savory flavor, but check labels for gluten-containing barley or wheat in some miso varieties.
- Binding: If you prefer not to use flax/chia, a tablespoon of aquafaba (the reserved liquid from the chickpea can, whipped slightly) can help bind, though it changes texture.
- Oil: Use any neutral, high-heat oil (grapeseed, sunflower, or avocado) that you prefer and can tolerate.
- Air fryer: If you don’t have one, you can bake these on a parchment-lined sheet at 200°C / 400°F for 15–20 minutes, flipping halfway through, until golden.
Always replace suspect items with certified gluten-free options if your sensitivity or celiac disease requires strict avoidance.
Ingredient alternatives for allergies or availability
If you’re managing other allergies or can’t source certain items, here are safe swaps and tips to avoid hidden gluten:
- Gluten-free oats: If oats cause issues for you, use chickpea flour, brown rice flour, or a certified gluten-free oat alternative. Chickpea flour increases protein but can be grainier — pulse it finely.
- Soy/tamari: Use coconut aminos (gluten-free) for a soy-free, gluten-free umami option. Confirm the brand for gluten-free certification if you need strict avoidance.
- Nutritional yeast: Some brands may be fortified with ingredients processed near gluten. Look for “gluten-free” on the label. If allergic to yeast, omit and increase savory spices.
- Spice blends and seasonings: Avoid mixes labeled “contains wheat” or those with maltodextrin without a clear source. Use single-ingredient spices (paprika, garlic powder) or certified gluten-free mixes.
- Sesame or hemp seeds: If you have seed allergies, omit them. They’re optional for texture and nutrition, not structural integrity.
- Flax/chia: If you have seed sensitivities, rely on oat flour (gluten-free) or a small amount of chickpea flour to bind.
Notes on avoiding hidden gluten:
- Read labels every time. Manufacturers change formulations.
- “May contain” or “made in a facility that also processes wheat” statements indicate potential cross-contact — decide based on your sensitivity.
- When in doubt, choose certified gluten-free labels for oats, tamari, nutritional yeast, and any packaged spice blends.
How to Make Vegan Chickpea Nuggets Step-by-Step
I’ve written these steps with beginners and gluten-free safety in mind. Prep your workspace, measure ingredients, and keep gluten-free utensils and surfaces clear of crumbs from other foods.
1) Prep and safety checks
- Wash your hands and work surfaces thoroughly. If you share a kitchen, wipe down the counter and use a clean cutting board and utensils that haven’t touched gluten-containing foods.
- Rinse and drain the canned chickpeas very well. If you want a firmer texture, remove the skins by gently rubbing them under running water — this is optional but helps a smoother paste.
- Preheat your air fryer to 190°C / 375°F. If you’re baking, preheat the oven to 200°C / 400°F.
Gluten-free safety tip: Keep your air fryer basket and tongs clean and free from gluten crumbs. If you air fry glutenous items in the same basket previously, ensure a thorough cleaning first.
2) Make the oat flour and seasoning mix
- Place 1 cup certified gluten-free oat flakes in a blender or food processor and blend until you have a fine oat flour.
- Transfer about 3/4 of this oat flour to a shallow bowl and mix in 1 tsp red pepper powder, 1 tsp onion seasoning, 1/4 tsp sea salt (part of the divided salt), and 1/4 tsp herb mix. This is your coating mix.
- Reserve the remaining oat flour for binding if needed.
Note: Mixing the coating separately helps create an even exterior that crisps up.
3) Blend the chickpea base
- In a clean blender or food processor, add the drained chickpeas, 1 tsp garlic seasoning (or garlic powder), 1/2 tbsp nutritional yeast, 1/2 tsp salt, and any optional add-ons you’ve chosen (1–2 tbsp ground flax or chia if using, 1–2 tbsp grated carrot or zucchini — well squeezed).
- Pulse in short bursts until the mixture becomes a thick, slightly sticky paste. Avoid over-processing into a puree; you want some texture so the nuggets hold better.
- Taste a small pinch and adjust salt or spices gently.
Gluten-free safety tip: Use a device that is clean and has not been used for gluten-containing doughs recently, or ensure it was thoroughly washed.
4) Form the nuggets
- Slightly dampen your hands with water to prevent sticking. Scoop about 1.5 tablespoons (or an amount you prefer) and shape into small nugget forms — about 1 to 1½ inches wide. Keep them compact so they don’t fall apart.
- If the mixture is too wet, add 1–2 tablespoons of reserved oat flour or a bit of chickpea flour. If it’s too dry and crumbly, add a teaspoon of water or a small splash of aquafaba.
Tip: For very uniform nuggets, use a small cookie scoop.
5) Coat the nuggets
- Roll each shaped nugget in the oat flour and seasoning mix until evenly coated. Press lightly so the coating adheres.
- Place the coated nuggets in a single layer in the air fryer basket. Don’t overcrowd — give space for hot air to circulate. Work in batches if needed.
Cross-contamination tip: Use dedicated utensils and bowls for the coating and placing the finished nuggets. Avoid dipping a coated nugget back into the bowl if your hands touched other foods.
6) Air-fry until crisp
- Lightly spray or brush the nuggets with avocado oil to help browning.
- Air fry at 190°C / 375°F for 10–12 minutes, flipping halfway through at around 5–6 minutes. They should be golden and slightly firm to the touch.
- If cooking in an oven, bake on a parchment-lined tray at 200°C / 400°F for 15–20 minutes, flipping once, until golden.
Cooking tip: Air fryers vary. Start checking at 8 minutes the first time you make them so you can dial in the exact time and temperature for your model.
7) Rest and serve
- Let the nuggets rest for 2–3 minutes after cooking so they set up — this helps them hold their shape.
- Serve warm with dips like ketchup, vegan mayo, a tahini-lemon sauce, or a simple dairy-free ranch.
8) Storage and reheating
- Store cooled nuggets in an airtight container in the fridge for up to 4 days.
- Re-crisp by reheating in the air fryer at 180°C / 350°F for 3–5 minutes, or in a hot oven for 5–7 minutes. Microwaving makes them soft rather than crispy.
Safety and batch-prep tip: If you plan to freeze, arrange nuggets on a tray until firm, then transfer to a freezer-safe bag. Freeze up to 2 months. Reheat from frozen in an air fryer for 6–8 minutes at 190°C / 375°F.
Common Mistakes to Avoid
Keeping food truly gluten-free means paying attention to labels, texture, and cooking technique. A few small missteps can change the result — here are the most frequent ones I see and how to prevent them.
Mistake 1: Using non-certified oats or suspect seasonings
Many people assume oats are always gluten-free. If you have celiac disease or high sensitivity, using non-certified oats or spice mixes processed with wheat can cause exposure. Always buy oats and seasonings labeled “certified gluten-free” and inspect spice blends for hidden additives that may contain gluten.
Mistake 2: Incorrect texture — mixture too wet or too dry
If the chickpea mixture is too wet, the nuggets will fall apart; too dry and they’ll be crumbly. I recommend pulsing the chickpeas until thick but still slightly textured. Use reserved oat flour or a tablespoon of chickpea flour to firm up a wet mix, or add a teaspoon or two of water/aquafaba if it’s too dry. Slightly damp hands help shape without sticking.
Mistake 3: Overcrowding the air fryer or under-cooking
Crowding reduces airflow and prevents even crisping, often leaving soggy interiors. Arrange nuggets in a single layer with small gaps. Flip halfway and watch cooking times—air fryers differ, so use visual cues (golden color and firm texture) rather than relying only on the clock.
Serving Suggestions for Vegan Chickpea Nuggets
These nuggets are versatile and fit into balanced, gluten-free meals. Below are easy ideas to turn them into family-friendly plates.
I like to serve these as part of a meal that includes vegetables and a whole-food starch for balance.
Balanced plate: nuggets + salad + grain
Serve 3–4 nuggets with a mixed green salad (spinach, cherry tomatoes, cucumber) and a side of quinoa or brown rice (both gluten-free). Add a lemon-tahini dressing for healthy fats and bright flavor.
Dips and finger-food style
Make a dipping trio for kids or entertaining: ketchup, vegan mayo mixed with a little garlic powder, and a simple avocado-yogurt dip (dairy-free yogurt). Serve nuggets on a platter with carrot sticks and cucumber slices.
Meal-prep bowls
Layer cooked millet or brown rice, roasted vegetables (broccoli, bell pepper, sweet potato), and 3–5 reheated nuggets. Drizzle with tamari-free sauce or a squeeze of lemon for a quick workweek lunch. Pack sauce separately to keep nuggets crisp.
Conclusion
I want you to feel confident making these Vegan Chickpea Nuggets as a safe, tasty option in your gluten-free kitchen — they’re flexible, easy to adapt, and great for family meals or meal prep. If you’d like a visual step-by-step to follow alongside this recipe, this helpful tutorial complements the method well: Chickpea Nuggets – Vegan, Gluten-Free & Kid Approved! I hope you enjoy making and customizing these nuggets — tweak seasonings and add-ins to suit your tastes, and let them become a reliable go-to in your gluten-free rotation.
FAQs About Vegan Chickpea Nuggets
Yes, they can be safe if you use certified gluten-free ingredients — especially certified gluten-free oats, nutritional yeast labeled gluten-free, and tamari (if you use it) that’s certified gluten-free. Also ensure your workspace, utensils, and air fryer are clean and free from cross-contact with gluten-containing foods.
Absolutely. You can bake them at 200°C / 400°F on a parchment-lined baking sheet for 15–20 minutes, flipping halfway. They’ll crisp up nicely though the air fryer usually gives a slightly faster, crunchier finish. For oven baking, make sure to space them for proper airflow.
Yes. If you use cooked chickpeas, drain them well and pat dry to remove extra moisture. You may need to adjust binding (add a little extra oat flour or ground flax) because fresh-cooked chickpeas can be softer than canned. Flavor and nutrition remain similar.
Store cooled nuggets in an airtight container in the fridge for up to 4 days. To re-crisp, reheat in the air fryer at 180°C / 350°F for 3–5 minutes or in a hot oven for 5–7 minutes. Microwaving will warm them but make them soft and less crunchy.
I recommend simple gluten-free options like ketchup, vegan mayo, tahini-lemon sauce, coconut-aminos-based dipping sauce, or a dairy-free ranch made with gluten-free seasonings. Always check labels on prepared sauces to confirm they are labeled gluten-free if that’s required for your safety.

Vegan Chickpea Nuggets
Ingredients
Method
- Wash your hands and work surfaces thoroughly. Wipe down the counter and use a clean cutting board and utensils.
- Rinse and drain the canned chickpeas very well. Optionally remove the skins for a firmer texture.
- Preheat your air fryer to 190°C / 375°F or the oven to 200°C / 400°F.
- Blend 1 cup certified gluten-free oat flakes until you have a fine oat flour.
- Transfer about 3/4 of this oat flour to a shallow bowl and mix in the seasoning ingredients.
- In a clean blender, mix chickpeas with garlic seasoning, nutritional yeast, salt, and any optional add-ons until thick and slightly sticky.
- Dampen your hands slightly and scoop about 1.5 tablespoons, shaping them into nugget forms.
- Adjust moisture or dryness of the mixture as needed with oat flour or water.
- Roll each nugget in the oat flour and seasoning mix.
- Place the coated nuggets in the air fryer basket without overcrowding.
- Lightly spray the nuggets with oil and air fry for 10–12 minutes, flipping halfway through.
- Allow the nuggets to rest for 2–3 minutes after cooking and serve with your preferred dips.
- Store cooled nuggets in an airtight container in the fridge for up to 4 days.
- Reheat in the air fryer or oven to restore crispness.