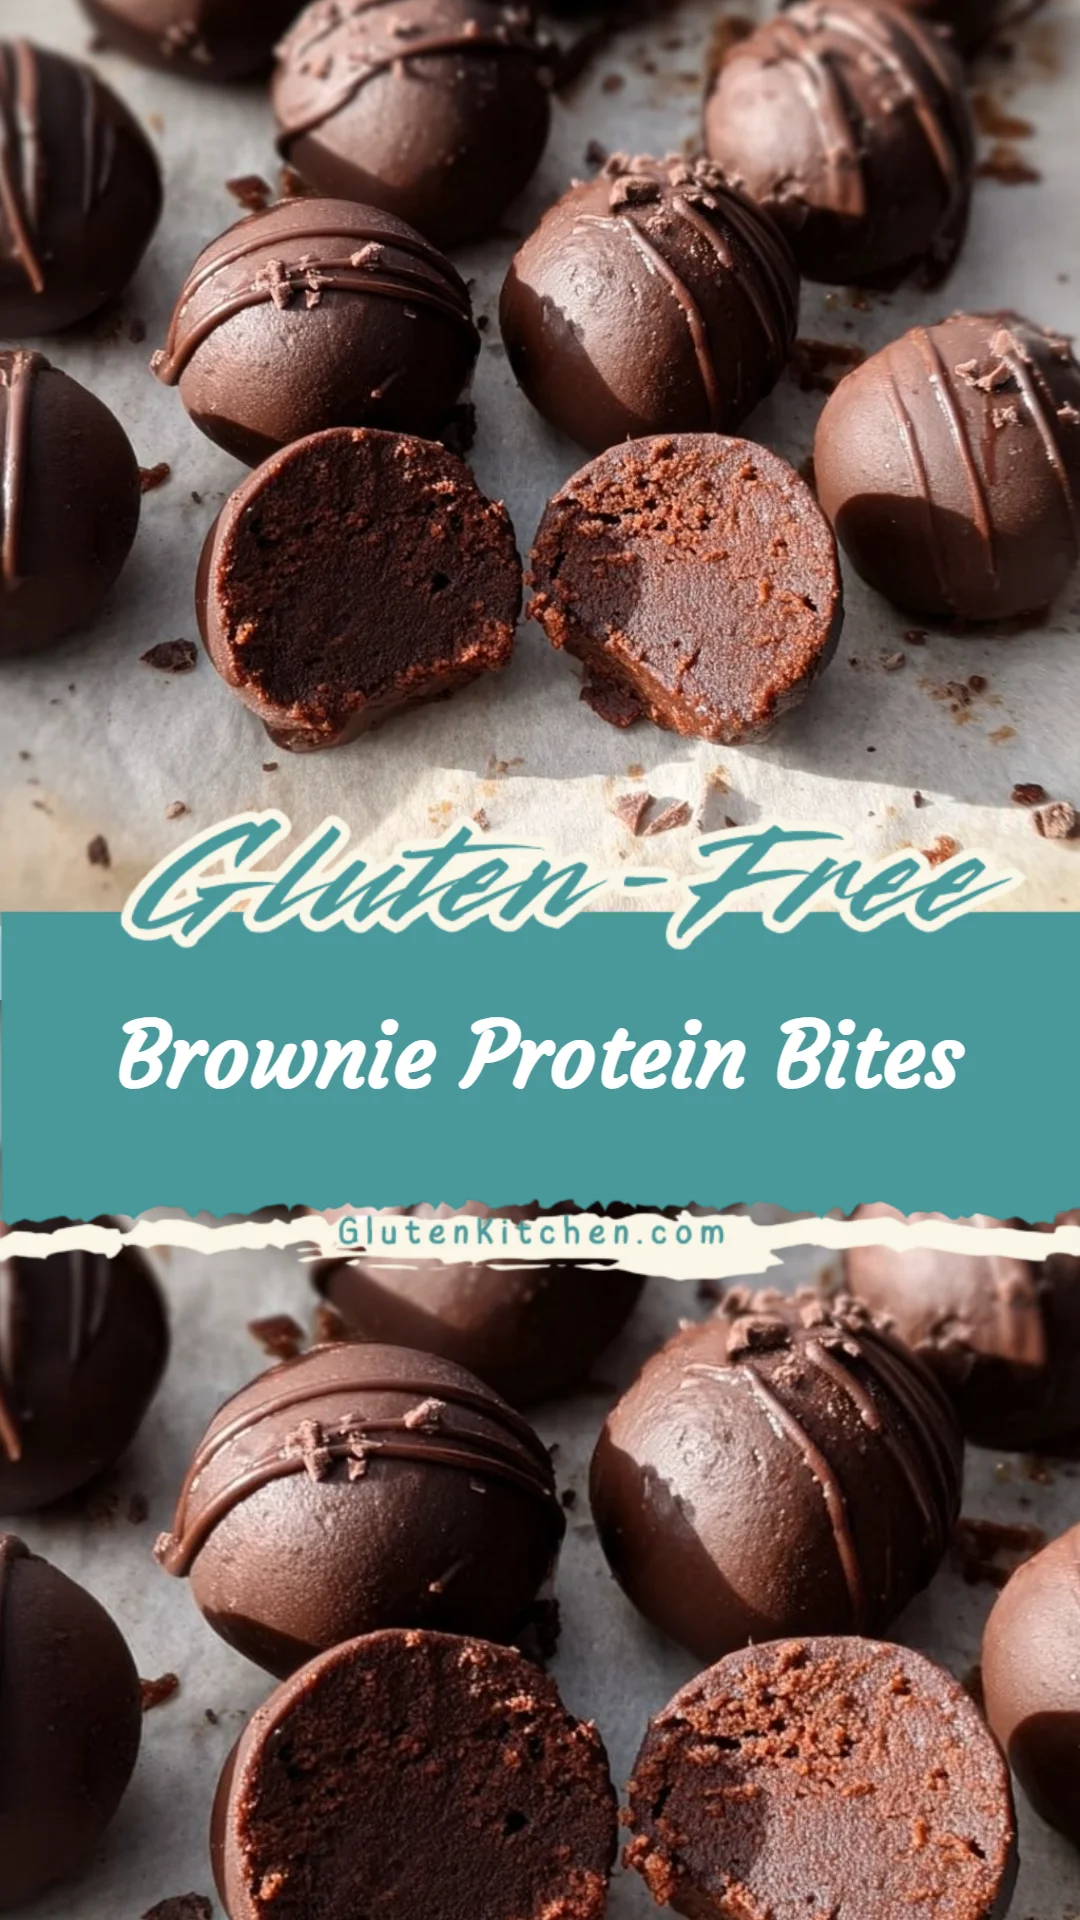
Brownie Protein Bites
I know how reassuring it feels to have simple, grab-and-go snacks that won’t upset your digestive comfort or your confidence when you’re avoiding gluten. These Brownie Protein Bites are an easy, no-bake option I turn to when I want something chewy, chocolatey, and protein-packed without fuss. I also like pairing make-ahead snacks with hearty weeknight dishes — for another high-protein, freezer-friendly option, see my high-protein spinach artichoke chicken casserole for meal-prep inspiration. This recipe is straightforward, and with a little label-reading and simple cross-contamination precautions, it fits well into a safe gluten-free kitchen.
A Quick Look at This Brownie Protein Bites Recipe
These Brownie Protein Bites are a no-bake, gluten-free snack that combines dates, cocoa, oats, and plant-based protein powder into chewy, chocolate-covered energy balls. They provide a nice balance of protein and fiber from the protein powder, oats, and dates, and healthy fats if you choose to use certain optional add-ins like nut butter or seeds. The recipe is naturally gluten-free when you use certified gluten-free oats, protein powder, and chocolate chips — always check labels for certification to avoid cross-contact. Flavor comes from cocoa powder and dark chocolate, while dates add natural sweetness and binding. They’re ideal for quick meal prep, school-safe lunches, or a post-workout bite that fits into a gluten-free lifestyle.
Ingredients You’ll Need for Brownie Protein Bites
Below I’ve expanded the ingredient list and grouped it so you can shop confidently. Everything listed here should be 100% gluten-free; where needed I note which items should be certified gluten-free.
Essentials
- 1 cup Medjool dates, pitted — soft dates help bind the dough and provide natural sweetness and fiber. Check that the packaging does not include any added ingredients with gluten.
- 1/2 cup unsweetened cocoa powder — choose pure cocoa (not a mix) and check the label for processing statements if you need strict gluten-free certification.
- 1/2 cup rolled oats — use certified gluten-free rolled oats to avoid cross-contact with barley or wheat.
- 1/4 cup plant-based protein powder — pea, brown rice, or mixed plant protein works well; pick a brand labeled gluten-free.
- 1/4 cup coconut flour — absorbs moisture and helps the bites hold their shape; coconut flour is naturally gluten-free.
- 1/2 cup dark chocolate chips — look for chocolate chips with a gluten-free statement or certification, since some brands are processed on shared equipment.
Optional Add-ons
- 2 tablespoons almond butter or peanut butter — adds creaminess and more protein; choose pure nut butter with no added gluten-containing ingredients.
- 1–2 tablespoons chia seeds or ground flax — boosts omega-3s and fiber, and helps binding.
- 1/4 teaspoon sea salt — balances the sweetness and enhances chocolate flavor.
- 1/2 teaspoon vanilla extract — optional for warmth; ensure the vanilla is alcohol-free if you want to avoid any trace flavoring concerns (most extracts contain alcohol, but the tiny amount used won’t make the recipe non-compliant for gluten-free diets; still, if you prefer, use vanilla powder).
- 1–2 tablespoons shredded unsweetened coconut — for texture or coating.
- 1–2 tablespoons chopped nuts (almonds, walnuts) — for crunch; ensure packaged as gluten-free.
Substitutions and Gluten-Free Adjustments
Certified gluten-free swaps:
- Rolled oats → certified gluten-free rolled oats (do not use regular oats if you react to cross-contamination).
- Protein powder → use a gluten-free certified protein powder (many flavored powders contain additives; check labels).
- Chocolate chips → use a brand labeled gluten-free or make a homemade drizzle from chopped gluten-free chocolate.
- Coconut flour → if coconut flour is not available, you can use extra protein powder or a small amount of almond flour, but almond flour will make the bites denser and moister; adjust quantity (start with 2–3 tablespoons almond flour and add more if the mixture is too sticky).
- Nut butter → if you have a nut allergy, replace with sunflower seed butter (must be labeled gluten-free).
Important label notes:
- Any ingredient processed in facilities that handle wheat/barley/rye can pose cross-contact risk; prefer certified gluten-free if you have celiac disease.
- Flavored or sweetened additives (protein powders, chocolate chips) often include emulsifiers or flavorings — verify they’re gluten-free.
Ingredient alternatives for allergies or availability
I want these options to be practical, so here are straightforward swaps and notes to help if you have other allergies or can’t find an ingredient:
- Dates: If Medjool dates are unavailable, try chopped soft deglet noor dates rehydrated in warm water for 10 minutes, then drained. Dates are naturally gluten-free.
- Cocoa powder: Swap for carob powder if you’re sensitive to caffeine or chocolate; carob is naturally gluten-free and sweeter, so reduce any added sweeteners.
- Rolled oats: If you can’t tolerate oats at all, replace with 1/2 cup ground chia/flax mixture plus 2–3 tablespoons additional protein powder to achieve binding; note texture will change — the bites will be denser and less chewy.
- Plant-based protein powder: If you don’t have protein powder, increase coconut flour slightly (add 1–2 tbsp) and consider 2 tbsp of ground nuts or seeds to add protein; the bites will be lower in protein without the powder.
- Coconut flour: If allergic to coconut, use almond flour (start with 3 tbsp) or additional oats (certified gluten-free) to adjust consistency.
- Dark chocolate chips: Use cacao nibs for less sugar and more crunch, but cacao nibs won’t melt the same for coating; instead, roll bites in powdered cocoa or shredded coconut.
Notes on avoiding hidden gluten sources:
- Vanilla extract and flavorings rarely contain gluten, but always choose products labeled gluten-free if you have celiac disease.
- Some protein powders include maltodextrin derived from wheat in rare cases — check the label and choose a clearly labeled gluten-free product.
- Pre-packaged dates sometimes contain added oil or syrup — read the ingredient list.
- Chocolate can be manufactured on shared lines; pick a brand with a gluten-free statement if necessary.
How to Make Brownie Protein Bites Step-by-Step
I keep this recipe beginner-friendly and focused on gluten-free safety. Use clean utensils, a wiped counter, and freshly washed hands to reduce cross-contact.
Prepare your workspace and ingredients
- Wipe down surfaces, use clean bowls and a clean food processor work bowl.
- Verify that all ingredients are certified gluten-free where indicated (oats, protein powder, chocolate chips). Open packages away from any crusty bread or flour in your kitchen to reduce airborne cross-contact.
- Pit the dates if they aren’t already pitted. If dates are dry, soak them in warm water for 5–10 minutes and drain well.
Blend the base mixture
- In a food processor, add the pitted dates, 1/2 cup cocoa powder, 1/2 cup certified gluten-free rolled oats, 1/4 cup plant-based protein powder, and 1/4 cup coconut flour.
- Pulse until the mixture forms a cohesive, sticky dough. Scrape down the sides as needed. If the mix is too dry and crumbly, add 1 teaspoon of warm water or 1/2 tablespoon almond butter at a time until it holds together. If it’s too wet, add 1 tablespoon coconut flour or 1 tablespoon protein powder and pulse again.
Test the texture and flavor
- Pinch a small piece and press it together; it should hold shape and be slightly tacky but not wet. Taste and adjust: add a pinch of salt or 1/2 teaspoon vanilla extract if desired, and pulse to incorporate.
- If you added vanilla extract, ensure it’s from a brand you’re comfortable with; for strict avoidance of alcohol-based extracts, use vanilla bean powder.
Roll into balls
- Scoop the mixture by heaping teaspoons and roll into small balls about 1 inch (roughly the size of a walnut). Wetting your hands slightly helps if the dough is sticky.
- Place the rolled balls on a parchment-lined tray or plate. The parchment prevents sticking and avoids contamination from non-food-safe surfaces.
Melt the dark chocolate
- Place 1/2 cup dark chocolate chips in a microwave-safe bowl. Microwave in 20–30 second bursts, stirring between each burst until smooth. Alternatively, use a double boiler: simmer water in the bottom pot, place a heatproof bowl on top, and stir chocolate until melted.
- Ensure the bowl and utensils are clean and gluten-free. If you’re using a microwave-safe bowl that previously had gluten foods, wash it thoroughly first.
Coat the bites
- Using a fork or dipping tool, dip each ball into the melted chocolate and turn to coat evenly. Allow excess chocolate to drip back into the bowl.
- Place the coated bites back on the parchment-lined tray. Optionally, sprinkle a pinch of sea salt, shredded coconut, or chopped nuts on top before the chocolate sets.
Chill to set
- Refrigerate the tray for at least 20–30 minutes until the chocolate hardens. You can also freeze them for 10–15 minutes if you’re short on time.
- Once set, store the bites in an airtight container in the refrigerator for up to 2 weeks, or freeze for up to 3 months. (Storage details are below in FAQs.)
Serve and enjoy
- Let chilled bites sit at room temperature for 5–10 minutes before eating if you prefer a softer chocolate shell. Enjoy as a snack, dessert, or post-workout treat.
Gluten-free safety reminders while making these:
- Use dedicated utensils or wash well between uses if you share a kitchen with gluten-containing foods.
- Keep the dates and oats sealed when not in use.
- If you have celiac disease, consider preparing these on a clean counter space away from any breadcrumbs, flour, or wheat-based items.
Common Mistakes to Avoid
Staying vigilant about cross-contact and texture makes these bites successful every time. I’ve seen cooks make simple errors that change the texture or introduce gluten — here’s how to avoid them.
Mistake 1: Using non-certified oats or ingredients and risking cross-contact
Always use certified gluten-free rolled oats and verify chocolate chips and protein powder have gluten-free labels. Oats are often processed near wheat and can contain traces of gluten unless certified. If you or someone you cook for has celiac disease, even small cross-contact matters. Store gluten-free ingredients separately from wheat-containing items.
Mistake 2: Wrong dough consistency — too wet or too dry
If the mixture is too wet, the bites will be gummy and won’t hold their shape; add a tablespoon of coconut flour or extra protein powder, a little at a time, to firm it up. If it’s too dry and crumbly, add a teaspoon of warm water or a half-teaspoon of nut butter and pulse until it binds. Small adjustments make a big difference — add gradually.
Mistake 3: Overheating chocolate or causing bloom
When melting chocolate, don’t overheat it: microwave in short bursts and stir frequently, or melt gently over a double boiler. Overheated chocolate can seize or develop a grainy texture. If the chocolate thickens too much, stir in a small amount (1/4 tsp) of neutral oil like coconut oil to smooth it, but only if you’re sure that oil is labeled gluten-free and hasn’t been contaminated.
Serving Suggestions for Brownie Protein Bites
These bites are versatile and easy to fold into everyday gluten-free meals. I like serving them in ways that balance nutrition and convenience.
I recommend pairing them with simple, balanced options: think fruit for vitamins, yogurt for extra protein and calcium, or a cup of herbal tea for a calming snack. Below are three practical serving ideas I use regularly.
Pair with fresh fruit and a glass of milk (dairy or plant)
Serve two Brownie Protein Bites with sliced strawberries, apple slices, or a banana and a small glass of your favorite milk (almond, oat — certified gluten-free, or dairy). This makes a balanced snack with carbs, protein, and healthy fats.
Add to a lunchbox with a savory protein and crunchy veg
Include 2–3 bites in a packed lunch alongside hard-boiled eggs, hummus with carrot sticks, or grilled chicken (if your meal plan includes it). The bites act as a sweet finish that still has protein and fiber.
Post-workout boost with Greek yogurt and berries
Stir a spoonful of Greek yogurt with berries and serve one or two bites on the side. The yogurt adds extra protein and calcium while the bites provide quick energy and satisfying chocolate flavor.
Conclusion
I hope you feel encouraged to try these Brownie Protein Bites — they’re a practical, safe, and adaptable gluten-free snack that you can make in about 30 minutes, mostly hands-off. I like how they store well and travel easily, making them useful for busy days, school snacks, or after workouts. If you want another take on chocolatey, bite-sized protein treats, you might enjoy Delish’s Cosmic Brownie Protein Bites recipe for additional inspiration.
FAQs About Brownie Protein Bites
Brownie Protein Bites can be safe for people with celiac disease when you use certified gluten-free ingredients — especially oats, protein powder, and chocolate chips. I always recommend checking labels for a gluten-free statement and preparing the bites on clean surfaces to avoid cross-contact.
Yes. If you don’t have protein powder, you can increase the coconut flour slightly and add ground nuts or seeds (like 2 tablespoons of almond meal or ground flax) to help with binding and protein content. Expect a slightly different texture and lower protein per bite.
Stored in an airtight container, Brownie Protein Bites keep in the refrigerator for up to 2 weeks. For longer storage, freeze them in a single layer on a tray until firm, then transfer to a freezer-safe bag for up to 3 months. Thaw in the fridge or at room temperature for 10–15 minutes before enjoying.
Yes. To make nut-free bites, skip any nuts or nut butter and use sunflower seed butter or tahini as a binder if you want extra creaminess. Also avoid cross-contact by using seeds and ingredients processed in nut-free facilities if you have a severe allergy.
The ideal Brownie Protein Bites texture is chewy and slightly tacky — they should hold together without crumbling and not be overly wet. If they’re crumbly, add small amounts of liquid (1 tsp water or nut butter). If they’re too sticky, add 1 tablespoon coconut flour or protein powder and pulse until it firms up.

Brownie Protein Bites
Ingredients
Method
- Wipe down surfaces and use clean bowls and a clean food processor work bowl.
- Verify that all ingredients are certified gluten-free where indicated.
- Pit the dates if they aren’t already pitted.
- If dates are dry, soak them in warm water for 5–10 minutes and drain well.
- In a food processor, add the pitted dates, cocoa powder, rolled oats, protein powder, and coconut flour.
- Pulse until the mixture forms a cohesive, sticky dough.
- If the mix is too dry, add warm water or almond butter until it holds together.
- If it’s too wet, add more coconut flour or protein powder.
- Scoop the mixture and roll into small balls (roughly the size of a walnut).
- Place the rolled balls on a parchment-lined tray.
- Melt dark chocolate chips in a microwave-safe bowl, stirring frequently.
- Or use a double boiler until the chocolate is smooth.
- Dip each ball into the melted chocolate and allow excess to drip off.
- Optionally, sprinkle toppings before chocolate sets.
- Refrigerate the tray for at least 20–30 minutes until the chocolate hardens.
- Let chilled bites sit at room temperature for 5–10 minutes before eating.
- Enjoy as a snack, dessert, or post-workout treat.